Routing Configurations
Sometimes an Instance will be connected to more than one network. Mostly, one of those networks is the Public network to access the inter.NET The Instance Routing includes the Instance’s internet access and a Default Route’s access to a Public Network’s Gateway IP in the Instance’s OS Routing Table. Even private networks might need Gateway IP in cases. In these situations, if the Instance has two interfaces - one private and one public - there will be two Default Routes in the Routing Table simultaneously. This will result in the Instance’s disconnection from the internet because of the wrong routing.
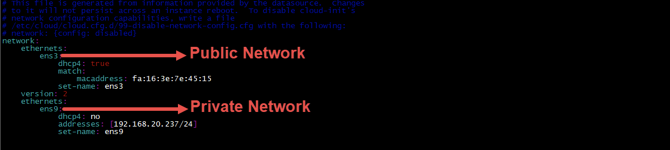
For example, as illustrated in the image below:

You can see that once the required networks are assigned, two default routes are created. According to the priority, internet access is through Gateway IP: 192.168.20.1, which is incorrect and needs to be deleted. Only the Public Network’s routing table must be manually configured to save those configurations permanently. No default gateways must be determined so that internet access can happen correctly through the Public Network. The two configuration guides for Ubuntu 18 and Windows 2019 are provided below.
Network Configurations for Ubuntu 18
First, you need to edit the config file for the Network Manager or Netplan. Open the file with the editor software of your choice (such as vim /etc/netplan/50-cloud-init.yaml) and change it like the following:
Save the changes and close the file. Then, apply the changes to the OS:

To make sure of the applied changes, check the Routing Table.

As you can see, the changes are applied to the OS correctly.
Network Configurations for Windows Server 2019
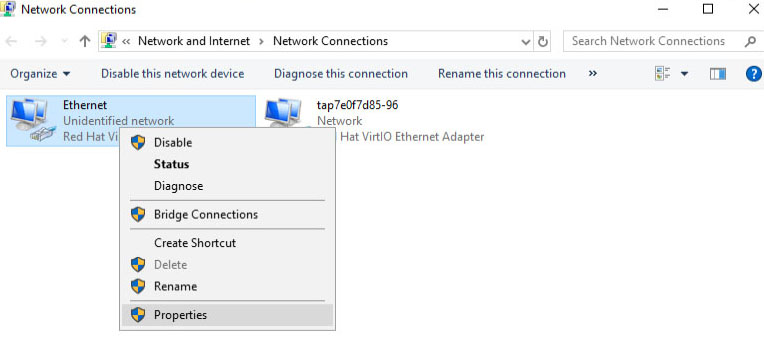
Enter the ncpa.cpl command in Run to open the Network Connections window. Then right-click on the Network Card related to the internal network interface and select Properties.
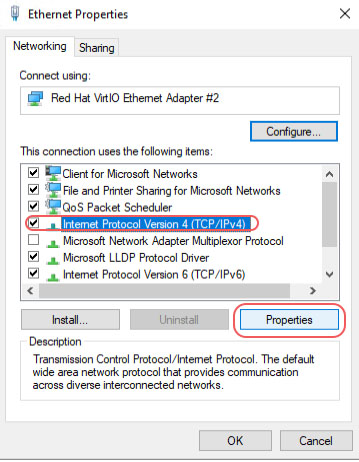
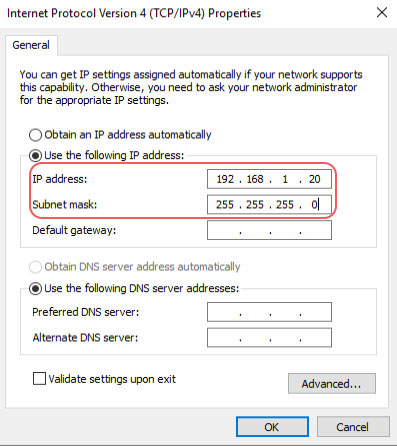
On the next page, select Internet Protocol Version 4 and click on Properties.
On the opened window, check the Use the following IP address option and enter the IP Address and Subnet Mask information. Then, click OK.
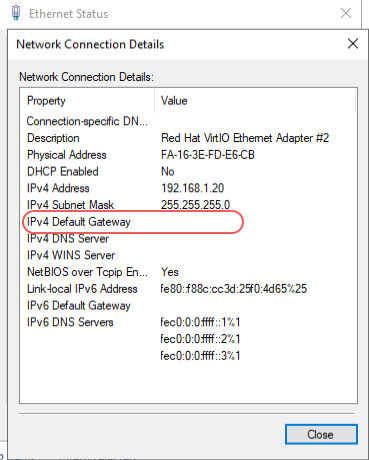
To see the applied changes, double-click on the Network Card and select Details. There, you can see whether the changes have been applied or not.