DNS Records
Once you have registered your domain in the Arvancloud user panel, you need to transfer your domain’s DNS records to your Arvancloud account to be able to activate the DNS and CDN services. You can either enter those records manually or import the DNS Zone File. Here, you can learn how to import these records from the Control Panels such as cPanel and DirectAdmin and how to import DNS Zone File.
Importing DNS Records from cPanel to Arvancloud User Panel
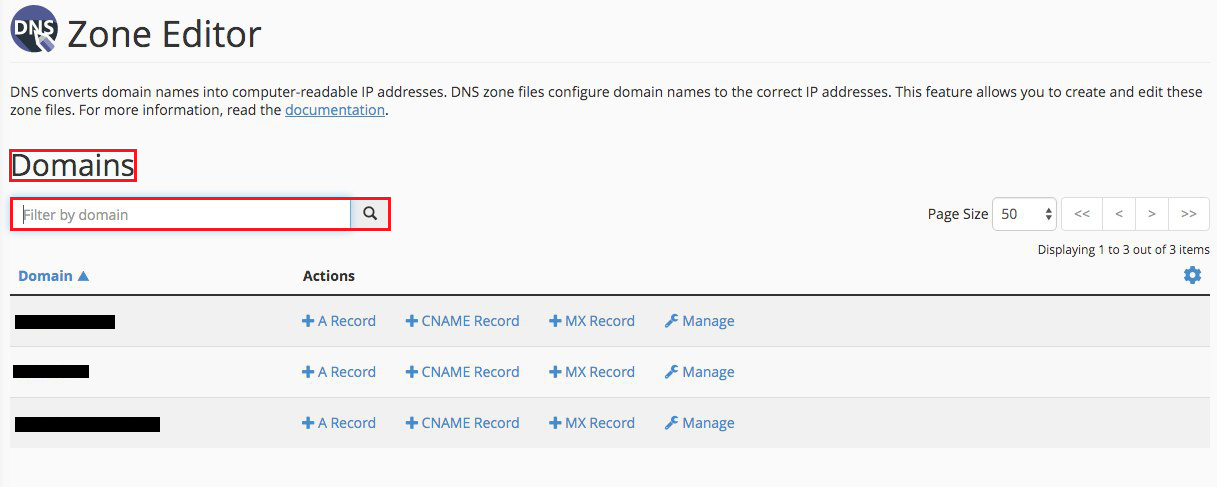
If using the cPanel host, go to the control panel section and select Zone Editor.

Next, in case you have registered more than one domain, enter your domain name in Domain section.

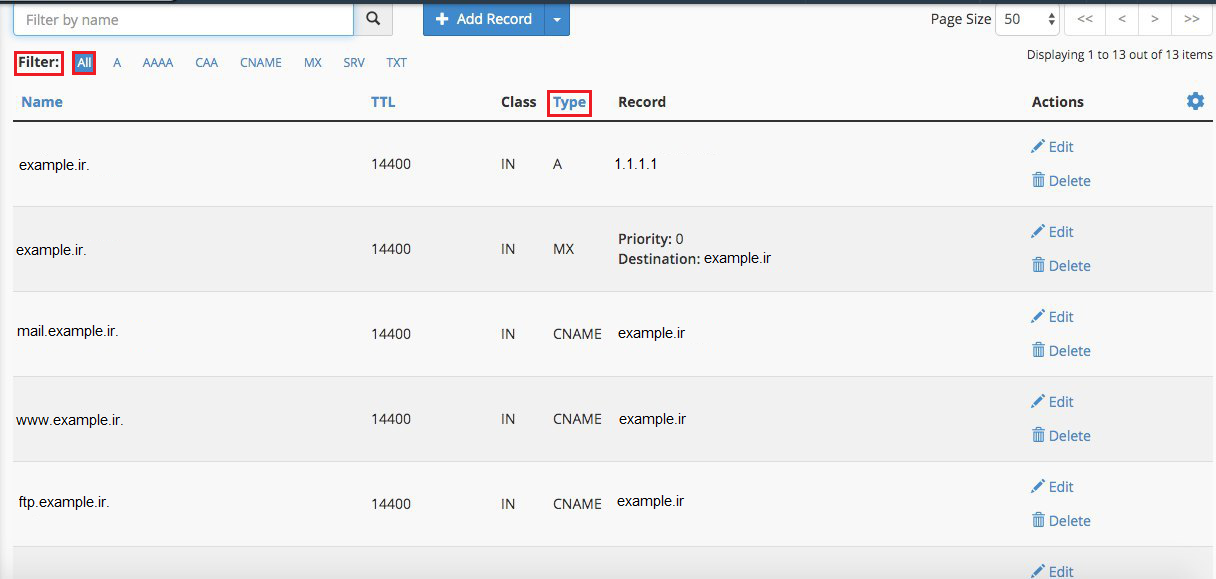
Set the filter to All to see all of the related records.

Import all of these records to the DNS Records section of your Arvancloud account under the CDN service.
Importing DNS Records from DirectAdmin to Arvancloud User Panel
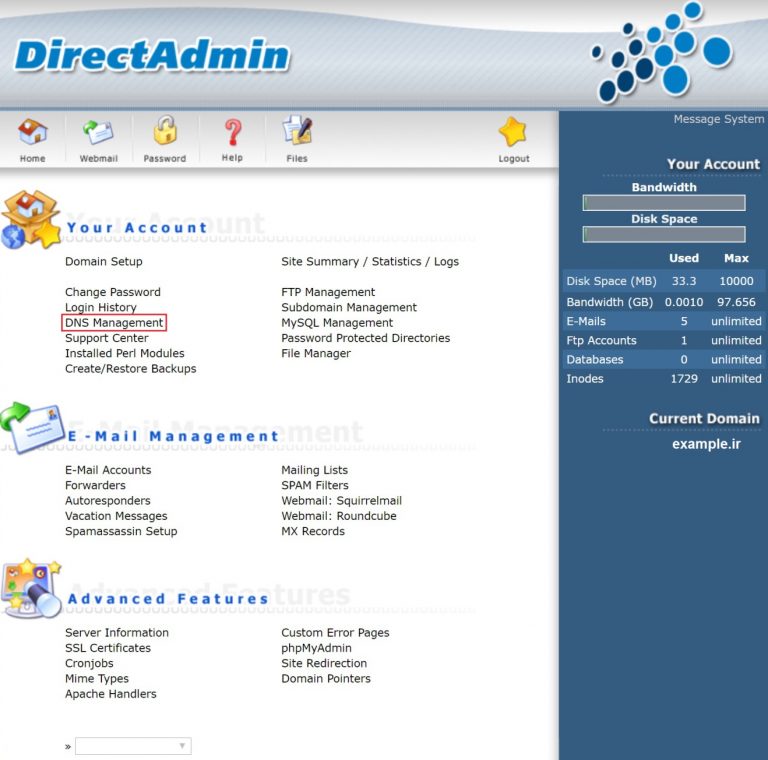
If using the DirectAdmin host, go to the control panel section and select DNS Management.

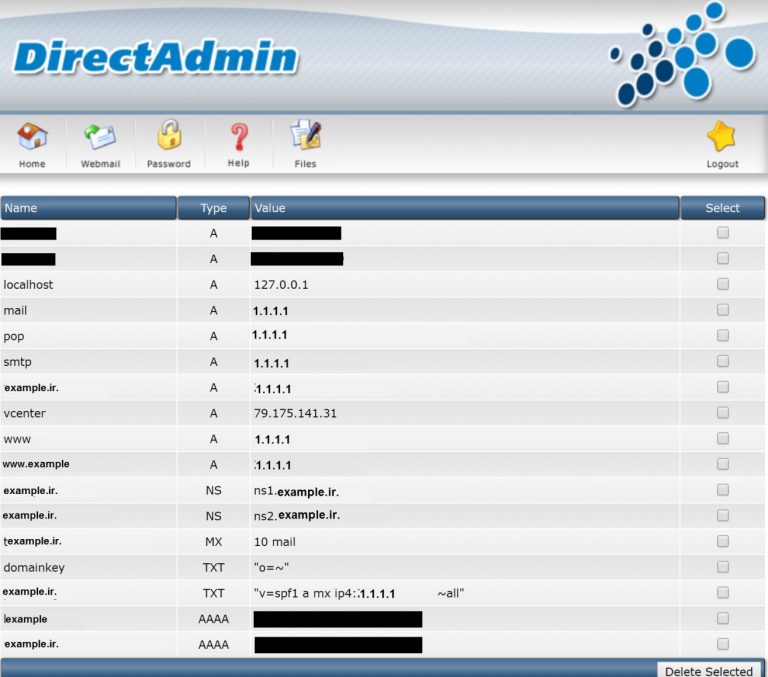
You can see your domain’s DNS records in the opened window.

These records must be imported to the DNS Records section of your Arvancloud account under the CDN service.
How to Upload the DNS Zone File to Arvancloud User Panel
In the hierarchical structure of DNS, each Zone specifies that a domain and its related sub-domains are under what management. Creating a domain creates a Zone in which the domain records will be saved in the text format.
When changing the DNS server, the DNS records of the domain must be transferred from the previous DNS server to the new DNS server. There is an option to add them manually, but the more secure and convenient method is to upload the DNS Zone File and import the records to the new DNS server.
If you are using the Cloud DNS of Arvancloud, you will be able to transfer all the DNS records related to your domain directly from your previous DNS server to the DNS servers of Arvancloud by uploading the DNS zone file in the user panel.
However, before this, you need to access the DNS Zone File of your domain. DNS service providers usually provide ways to access this file. If your DNS server is BIND, you can find it in a file titled named.conf.
Tips about DNS Zone File
- Please note that the DNS Zone File you want to upload must be in the BIND standard format.
- In this file, the stored TTL value for a record is supported as it was defined. However, when no TTLs are defined for a record, the TTL will be considered 120 seconds by default.
- The $ORIGIN instruction in the uploaded DNS Zone File will be ignored.
- The $INCLUDE and $GENERATE instructions in the uploaded DNS Zone File will be ignored.
- Only A, AAAA, CAA, CNAME, MX, NS, SOA, SRV, PRT, and TXT records will be supported in the uploaded DNS Zone File.
- The SOA record in the uploaded DNS Zone File will be ignored, and a new one from Arvancloud will be substituted.
- The NS record in the uploaded DNS Zone File will be ignored, and a new one from Arvancloud will be substituted.
Step-by-step Guide of DNS Zone File Uploading to Arvancloud User Panel
To upload your DNS Zone File in the user panel, under the CDN section choose the DNS Records option from the menu on the left.

In the opened window, click on the DNS Import option. By clicking on this option, a window will open for you, with the help of which you can select the DNS zone file of the domain that you have previously saved on your computer.

In this window, find and select your file from the path where you saved it. Finally, after selecting the file, click on the open option. In this way, the DNS zone file of the domain, upload, and DNS records of your domain will be added to the Arvancloud user panel.
To upload your DNS Zone File via API, you can use this sample code:
curl --request POST \
--url https://napi.arvancloud.ir/cdn/4.0/domains/example.com/dns-records/import \
--header 'Accept: application/json' \
--header 'Authorization: API KEY 1 2 3 4' \
--header 'content-type: multipart/form-data' \
--form f_zone_file=@/path/to/txt/file.txt

